Why is my spray paint cracking? Spray paint crackling is a frequently encountered issue that can frustrate even the most seasoned DIY enthusiasts.
It manifests as unsightly fissures and lines in the painted surface, marring the otherwise smooth finish you had hoped to achieve.
Whether you’re spray painting wood or a metal surface in a furniture restoration project, spray painting glass, revamping your car’s appearance, or engaging in any creative endeavor involving spray paint, the problem of cracked paint job is something you’d rather avoid.
In this article, we will delve into the root causes of why spray paint crackles, shed light on the factors that make the spray paint crackle, and learn how to fix spray paint crackle.
Table of Contents
Why is my spray paint cracking?
So if you’re wondering “Why is my spray paint cracking?”, keep reading.
This section will delve into the key causes of spray paint job cracking, offering explanations and insights to help you identify the root of the problem.
Thermal expansion and contraction
Temperature fluctuations can exert stress on painted surfaces due to thermal expansion and contraction. When exposed to heat, materials expand, and when cooled, they contract and make the spray paint crackle.
Painted surfaces may not be able to flex sufficiently, leading to stress in the form of cracks. For instance, on a hot day, the painted surface expands, and when it cools down at night, the paint cracks.
These repetitive cycles can make the spray paint crackle, which eventually becomes visible. In extreme cases, rapid or significant temperature changes can exacerbate this issue.
Inadequate surface preparation
Surface preparation is the foundation of a successful spray paint project.
Neglecting this crucial step can result in poor paint adhesion, leading to peeling, and chipping, and making the spray paint crackle.
An inadequately prepared surface might have contaminants like dirt, dust, rust, or old wet paint, which interfere with the new paint’s ability to bond effectively.
Proper surface preparation ensures a smooth, clean canvas for the paint to adhere to and minimizes the risk of a paint crack.
Poor paint quality
Lower-quality paints often lack the flexibility and durability necessary to withstand the stresses of environmental changes and general wear and tear.
Over time, these paints can become brittle and make the spray paint crackle, especially in adverse conditions.
Application errors
Some of the most common errors when you apply spray paint include:
- Holding the spray can too close to the surface, causes the paint to pool and run.
- Holding the can too far from the surface leads to uneven coverage.
- Applying a heavy, thick coat in a single pass, can lead to sagging and make the spray paint crackle.
- Not allowing adequate time to let coats be completely dry (primarily, between the first and the second coat), can result in wet paint, improper adhesion, and, in the end, cracked paint if spray paint dries less than 85%.
By addressing these root causes of the spray paint crack issue, you’ll be better equipped to achieve a flawless, durable finish in your spray painting projects.
Preventing spray paint cracking
In this section, we delve into the art of preventing spray paint cracking, equipping you with the knowledge and techniques to ensure that your projects maintain their pristine appearance and integrity.
Proper techniques for application
Guidelines for spray paint application, including distance and speed: maintain a consistent distance of approximately 6-8 inches between the spray can and the surface.
This distance ensures even coverage and minimizes the risk of pooling, which can lead to spray paint crackling.
Use controlled, overlapping strokes to cover the surface uniformly with light coats. Keep the can in motion while spraying to avoid over-applying paint in one area and under-applying in another.
Adjust the speed of your strokes when you apply paint to match the specific type of paint you’re using.
Some paints may require faster or slower application to achieve the desired finish.
Tips for achieving a consistent layer:
- Start each stroke off the surface and finish it off the surface to prevent uneven deposits of paint at the stroke’s beginning and end.
- Apply multiple lighter coats rather than a few heavy coats. The second coat, as well as the last and final coat, should be thin enough to allow the previous thin layer to dry without sagging or running.
- Check for any drips or runs immediately and address them while the paint is still wet. A quick correction can prevent issues later.

Surface Preparation
Step-by-step instructions for thorough surface preparation:
- Begin by thoroughly cleaning the wood, plastic, or metal surface with a suitable cleaner or solvent to remove all contaminants, such as grease, oil, dirt, powdered paint, and dust, before you apply paint.
- If the surface has imperfections like cracks or dents, repair them using appropriate fillers or patching materials. Sand the patched areas to a smooth finish.
- Use sandpaper to lightly sand the entire surface. This step ensures better adhesion by creating a slightly rough texture but smooth surface for the paint to grip.
- After sanding the primed surface gently, clean the surface again to remove any dust or debris created during the process.
- If the surface is porous, apply a primer to create a smooth surface that will promote good paint adhesion.
How to fix imperfections in the surface before painting: for minor imperfections, fill them using a quality filler or putty and sand the area smooth once it’s dry.
In the case of larger imperfections or damage, consider more substantial repairs, possibly involving patching and refinishing before proceeding with painting.
Paint Selection
Factors to consider when choosing the right spray paint:
- Evaluate the material you’ll be painting (e.g., metal, wood, plastic) and select a paint formulated for that specific material.
- Consider the intended use of the painted object. For outdoor applications, choose paints designed to withstand the elements.
- Take into account the color, finish, and durability requirements of your project.
Recommended paint brands and types:
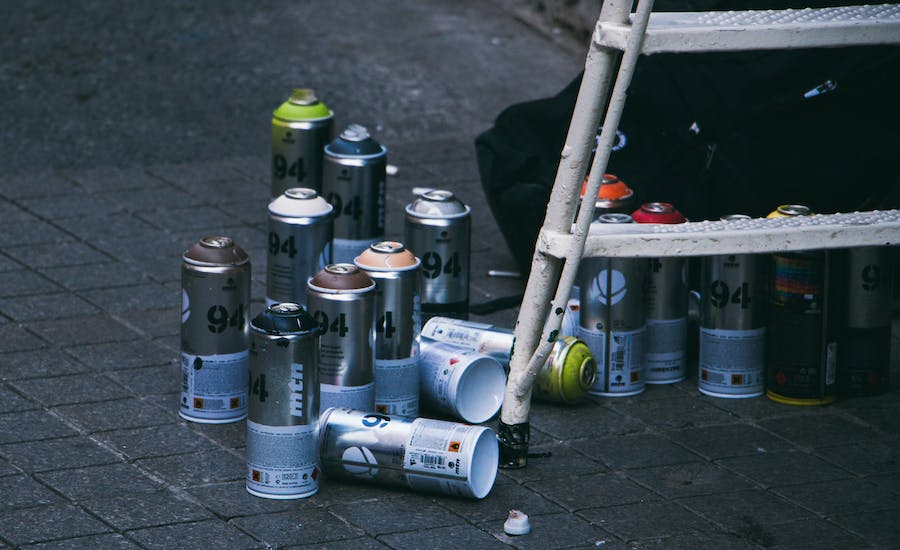
- While specific brand recommendations can vary based on location and availability, some reputable spray paint brands include Rust-Oleum, Krylon, and Montana Cans.
- When choosing paint types, consider factors like enamel paints for durability, acrylic paints for versatility, and high-temperature paints for surfaces exposed to heat.
Environmental considerations
How to control temperature and humidity during painting:
- Whenever possible, choose a dry and temperate day for your spray painting project. High humidity can hinder the drying process and lead to issues like bubbling or cracking.
- If painting indoors, ensure adequate ventilation to prevent the buildup of fumes, and consider using fans or dehumidifiers to control humidity.
Suggestions for ideal painting conditions:
- Ideally, aim for a temperature range specified on the paint can, typically around 70°F, as this helps the paint dry and cure properly.
- Protect the painted object from extreme temperature changes right after painting to avoid rapid thermal expansion and contraction.
By following these guidelines that help the paint stick better and taking the necessary precautions, you can significantly reduce the risk of spray paint cracking.

Troubleshooting
This section is your go-to resource for addressing and resolving issues related to spray paint cracking and other imperfections that may arise during your painting projects.
Addressing paint cracks
Tools and materials required for repairs:
- Sandpaper (fine-grit)
- Cleaning supplies (e.g., mild detergent, clean cloth)
- Paint scraper or putty knife (if necessary)
- Paint remover (if necessary)
- Primer (if needed for the surface type)
- Appropriate paint for touch-up or repair
- Brushes, rollers, or spray paint, depending on the size of the area to be repaired
Steps to fix cracked paint:
- Begin by identifying the extent of the paint cracking. Are the cracks superficial or deep? Do they cover a small area or are they widespread?
- For small surface cracks, start by sanding the affected area lightly to smooth the surface. Use fine-grit sandpaper, such as 220 or higher, to avoid further damage.
- Clean the sanded area to remove any dust or debris, and ensure it’s dry before proceeding.
- If the cracks are more significant or have penetrated the underlying layers, you may need to remove the affected paint. This can be done using a paint scraper, putty knife, or a suitable paint remover.
- Once the damaged paint is removed, follow the surface preparation steps outlined earlier in this article, including cleaning, sanding, and priming.
- Repaint the area using the proper technique and paint type, making sure to feather the edges of the new paint into the surrounding, undamaged paint to create a seamless finish.
Hiding imperfections
Techniques for concealing cracks and flaws in the paint: if the cracks are minor and not structurally significant, you can often hide them effectively with a bit of creativity.
One common approach is to use artistic techniques such as distressing or antiquing, which intentionally create an aged or weathered appearance.
Consider incorporating additional decorative elements, like stencils or decals, to mask imperfections. These can add an artistic touch to your project and divert attention from minor flaws.
Another method is to use textured finishes, which can help conceal surface irregularities and give your project a unique, tactile quality.
Suggestions for touch-up work:
- When conducting touch-up work, use a smaller brush or spray paint nozzle to focus on the affected area, rather than repainting the entire object.
- Ensure that the touch-up paint matches the color and finish of the existing paint as closely as possible. This might require testing and blending different paint shades or types.
- Pay attention to feathering the touch-up paint at the edges to create a seamless transition between the repaired area and the surrounding surface.
- Allow the touch-up paint to dry completely before assessing the results. You may need to repeat the process, if there are a few remaining patches, or make additional adjustments for a satisfactory finish.
Remember that while some minor paint cracks and imperfections can be concealed effectively, it’s essential to address more substantial issues by repairing and repainting the damaged areas of spray painting jobs.
Conclusion
Throughout this article, we’ve delved deep into the art of spray paint, from understanding the root causes of why spray paint crackles to exploring effective solutions and troubleshooting techniques.
You’re now better equipped to embark on your creative projects with confidence and precision.
As you apply the insights and tips provided in this article, you’ll find that your spray painting endeavors become smoother and more successful.
It’s important to note that perfection may not always be attainable, but the knowledge and techniques you’ve acquired will certainly bring you closer to it.
So, go ahead, unleash your creativity, and paint with confidence, knowing that the frustrating problem of spray paint cracking can be a challenge of the past.
With the right approach, your projects will shine with professionalism and longevity, leaving you with a sense of accomplishment and pride in your work.
FAQ
How do you fix crackling spray paint?
For minor cracks, sand the area, clean, and repaint.
For more severe issues, remove the damaged paint, prepare the surface, and repaint, feathering the edges.
Why is my paint cracking when it dries?
Poor surface prep, low-quality paint, excessive thickness (as the first coat doesn’t have enough time to become completely dry before the second coat), or rapid temperature changes make the spray paint crackle.
Proper prep, high-quality paint, thin coats, and stable drying conditions help to fix spray paint crackle.
Why does my clear coat keep cracking?
Clear coat cracking can result from improper application, poor surface prep, or the use of incompatible products.
Apply thin, even layers, prepare the surface, and ensure compatibility with a solution to prevent cracked spray paint.

Even though I have 10+ years of experience in the painting business, I am always trying to learn the latest coloring methods. I have been into colors since my teenage days. I spent a lot of time experimenting with new painting methods on multiple surfaces. Now, I want to spread my knowledge through my blogs and articles.

Hey, cool post You can check if there’s a problem with your website with Internet Explorer. Because of this issue, many readers will overlook your excellent writing because IE is still the most popular browser.
You have observed very interesting points! ps decent internet
site.Expand blog
My brother suggested I might like this website He was totally right This post actually made my day You cannt imagine just how much time I had spent for this information Thanks
I just wanted to drop by and say how much I appreciate your blog. Your writing style is both engaging and informative, making it a pleasure to read. Looking forward to your future posts!
I just could not depart your web site prior to suggesting that I really loved the usual info an individual supply in your visitors Is gonna be back regularly to check up on new posts
you are in reality a just right webmaster The site loading velocity is incredible It seems that you are doing any unique trick In addition The contents are masterwork you have performed a wonderful task on this topic
Tech to Force I appreciate you sharing this blog post. Thanks Again. Cool.
Tech Learner For the reason that the admin of this site is working, no uncertainty very quickly it will be renowned, due to its quality contents.
FinTechZoomUs For the reason that the admin of this site is working, no uncertainty very quickly it will be renowned, due to its quality contents.
Fantastic site A lot of helpful info here Im sending it to some buddies ans additionally sharing in delicious And naturally thanks on your sweat
I have been browsing online more than three hours today yet I never found any interesting article like yours It is pretty worth enough for me In my view if all website owners and bloggers made good content as you did the internet will be a lot more useful than ever before
Puraburn I truly appreciate your technique of writing a blog. I added it to my bookmark site list and will
Puraburn This is really interesting, You’re a very skilled blogger. I’ve joined your feed and look forward to seeking more of your magnificent post. Also, I’ve shared your site in my social networks!