Didn’t your hydro dip go as planned, or did you mess something up? It may look like crap when something is out of your hands. What do you do to fix it?
Can you remove hydro dip? Fortunately, eliminating hydro dip is possible. Anyone can get off it. But not everyone can do it precisely to make the surface ready for re-hydro dipping or give back the object its original look.
Knowing the proper process for removing hydro drip will help you complete the removal process simple and hassle-free. In this post, we will walk you through the process of how to remove hydro dip spray paint step-by-step. So, let’s dive deeper without further ado!
Table of Contents
Why Remove Hydro Dip Spray Paint?
Not all our plans go the same way we plan. A similar thing can happen for hydro dipping. Many new hydro dippers may not get precise results in all the areas.
Sometimes, you may have over-activated or under-activated the hydro dipping paint. Also, applying too thicker may cause unequal distribution of hydro dipping paint.
Besides, adding too thin paint and letting it dry completely won’t let you hydro dip further unless you remove the old hydro dip.
Moreover, you may not have followed the correct process for hydro dipping, which prevents the paint from adhering well to the surface. They might be showing cracking or peeling off issues.
Alternatively, too flat paint may lead to some air bubbles when the hydrographic becomes fully dry. Hence, you may need to remove hydro dip paint for different reasons.
What Is the Best Way to Remove Hydro Dip Spray Paint?
The process you will use for removing hydro dip depends on the object. We generally use hydrographic spray paint on various things such as glass, vehicle surfaces, woods, plastics, etc.
Usually, you will follow almost a similar method, but the materials you will use will vary. For instance, when getting off hydrographic from the glass object, use two items are necessary acetone and a professional glass cleaner. They will permit you to remove spray paint easily.
Likewise, taking off hydro dip spray paint from vehicle surfaces requires an alcohol-based paint remover and a lacquer thinner. When you want to scrape off the paint from wood surfaces, use denatured alcohol and a mineral spirit.
A paint stripper is another effect item used for getting hard-type hydro dip spray paint. This chemical weakens and separates the thicker layer of paint through penetration. Many DIY hydro dippers also use the sandblaster procedure.
You need to use special equipment to use this method for hydro dipping removal. However, it is easier to handle; a little bit more caution is what you will need.
The Tools You’ll Need to Get the Job Done Quick!
Generally, you don’t need to have many tools to remove hydro dip paint. Many of them are already in your home. Here are the listed times you will need.
| No. | Things You Will Need |
|---|---|
| 1 | Painter tapes |
| 2 | A denatured alcohol |
| 3 | A rag or a blue paper towel |
| 4 | A red or gray scotch-brite hand pad |
| 5 | A decent degreaser to clean unwanted paint |
How to Remove Hydro Dip Spray Paint?
To get off hydro dipping accordingly, following some practical steps is necessary. Here are the essential phases to follow
Step: 1—Figure Out What Went Wrong
The first thing you need to do is figure out what went wrong in the first place. And your cell phone is the best tool for figuring out what you did wrong.
This is a great tool to set this up over on the side of your tank or wherever you are dipping. You can record yourself and figure out most of the time what you did wrong.
Different types of mistakes you may make while doing hydro dipping. For example, you may have gone in too much of an angle or moved too much. Also, there might be over-activation or under-activation.
Step: 2—Rinse and Dry the Object
To make the challenging hydro-dipped paint softer, you need to rinse it. Put your part in your tank or similar things and rinse the part for about three to five minutes.
Get off all the PVA film that is slimy and nasty stuff leftover on the surface after you dip. After removing all these things appropriately, make sure to dry the object correctly.
Step: 3— Wipe with Denatured Alcohol
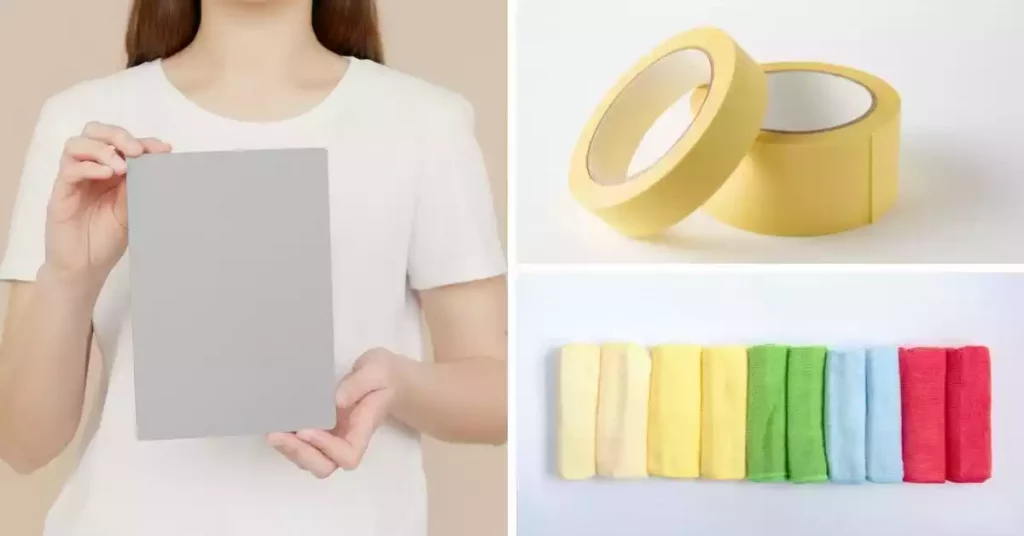
Here one important thing to remember is to protect the dipped side that looks good. You have no reason to scrape it when you prefer working on the messed-up area. Use painter tapes to tape off the side you want to protect.
Not all paint of hydro dip will go to remove hydro dip spray paint just by simply rinsing it. Getting rid of bad dip requires you to use denatured alcohol. You cannot use any other type of alcohol other than denatured since they won’t work for an easy removal process.
Simply put the solution on a rag or a blue paper towel and just wipe off the old pattern. As long as you are not scrubbing it really hard, it should not bother the paint too much. Go gently initially. If it requires, then put some extra pressure without overdoing it.
Aim at removing the old pattern as much as you can. Sometimes, you will leave little bits and pieces of the pattern down in the cracks, crevices, and valleys of your part, depending on what you’re dipping.
Step: 4— Scuff the Scotch-Brite Hand Pad
Once all the paints are off, grab a red or gray scotch-brite hand pad to scuff the part. This will help you to repaint it. It doesn’t take a whole lot.
After all, you should not try to scrub the paint off all. You are just simply scuffing the surface really quickly.
Step: 5— Degrease and Clean
Once the surface is well scuffed, you can take your degreaser and wipe everything off to ensure your part is good and clean.
Step: 6— Repaint 1 or 2 Coats
The next task is applying 1 or 2 base coats using a compatible primer. You can usually get away with just one coat for darker colors, and then it’ll be ready to re-dip on lighter colors.
Sometimes, it takes a full two coats to cover up any extra pieces of film you had. They might be stuck, and you couldn’t get off with the denatured alcohol.
Once your paint is dry to touch, it is ready to dip. You will take a minimum period than before to complete the hydro dipping task effortlessly.
Effective Products to Remove Hydro Dipping Spray from Sensitive Surface
We often clean hyper dip spray paint from some pretty sensitive surfaces like guitar bodies. It would be best if you were given more priority to not affecting the sound quality while removing spray paint from the guitar body.
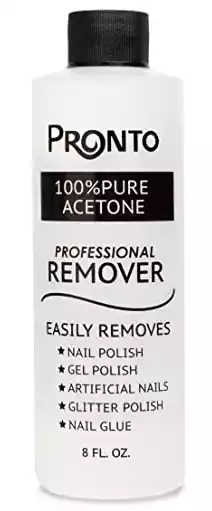
Though a lot of options are there, effectiveness will vary among them. A few of them may affect the sound quality after removing guitar spray paint. Apply automotive glaze removers or acetone to scrape off the paint layer from the guitar surface. Also, using lacquer thinner or nail polish remover (Pronto) seems okay.
Pronto contains solvent acetone. The active ingredient effectively removes latex-based and oil-based paints from your guitar surface.
Make sure to use lighter fluid initially before using any paint remover. This will make the surface cleaner and weaken the paint. If you don’t have the right skills, professionally removing it is better.
At home, you can try EZ Strip Paint and Varnish Stripper for softening the topcoat/finish of your guitar. It has professional strength to be effective and is safe for most guitar surfaces.
Tips for Removing Hydro Dip Paint Without Damaging the Surface
I have discussed the whole procedure of how to remove hydro dip spray paint. However, you can follow a few tips to make your paint removal task more manageable.
- Since different surfaces react differently, make sure to use a special pattern remover to smooth off.
- If you need to remove hydro dip paint from a tiny area, sand it lightly with 800-1000 mesh sandpaper and then apply the paint.
- Don’t use any harsh chemicals that may eat away the painted surface if it is too soft or sensitive.
- Wear all the protective equipment to ensure optimal safety.
- Take enough time to complete each step and make sure to clean the surface repeatedly.
Frequently Asked Question
Is It Possible to Totally Remove Hydro Dipping Spray Paint?
Yes, you can remove hydro-dipping spray paint from the particular surface. Using the right product and procedure is what will matter. Some painted objects may need more time to remove paints.
Does Hydro Dipping Spray Paint Last in Saltwater?
Continuous exposure of the hydro dipping spray paint in saltwater will weaken the paint. But high-quality paint with optimal base coat protection will last for a decent period.
Will Acetone Remove Hydro Dip?
Acetone is a powerful solvent-based chemical that can remove hydrographic paints from various surfaces such as plastics, glasses, woods, etc.
What Is the Most Common Way to Remove Hydro Dip Spray Paint?
The most common way to remove hydro dip spray paint is using a good quality paint remover that is specially made for a particular item or object.
Conclusion
Though removing hydro dip spray paint requires a little more effort and proper planning, you can get a successful result by following the correct procedure. We have already mentioned how to remove hydro dip spray paint thoroughly.
Avoid using any incompatible spray paints and chemical-based removal for your painting project. This may ruin your painting surface permanently, apart from not getting a perfect result. Hopefully, you will be able to get off the paint appropriately by following my guidelines.

Even though I have 10+ years of experience in the painting business, I am always trying to learn the latest coloring methods. I have been into colors since my teenage days. I spent a lot of time experimenting with new painting methods on multiple surfaces. Now, I want to spread my knowledge through my blogs and articles.

