As a new painter, you might face some hassles to paint various things, especially for the first time. Who knows, you may already have done a dusty spray paint on your preferred surface.
Thinking of how to fix dusty spray paint? You don’t have to toil as hard as you think to handle these mistakes. You just have to do a repainting task.
But being patient is necessary to deal with this problem. Otherwise, you’ll make the same mistake again.
This post will help you know why dusty spray paint occurs and how to quickly fix this issue with easy-proven methods. Let’s jump in!
Table of Contents
What is the Paint Dust?
Paint dust means the paint dries up completely before getting in touch with the surface. If the paint doesn’t contact the surface appropriately, the paint feels rough after spraying.
Generally, paint dust occurs when you’re applying paint on the wrong surface, using the bad paint, or spraying it too heavily.
When these spray paint problems arise, you’ll notice some “dust” between layers. Removing this “dust” is necessary.
In order to remove it, several approaches are available. For example, you can use a lightly damp cloth to get rid of them.
But you may sometimes go for a fine sanding for each layer. However, it depends on the surface where you painted and what type of material is used for the particular paint.
8 Most Common Causes of Dusty Spray Paint
Dusty spray paint can incur due to various causes. Here I am mentioning the most common causes.
1. Humidity
According to many house painters and decorators, you should do your painting tasks when the humidity level is 40% to 50%.
Your primary objective should be to achieve a well-calibrated drying time and no damage to the paint. If there are higher levels of water vapor, it may lead to lifting, non-adhesive situations, or other issues.
2. Lack of Surface Preparation
If your paint surface isn’t clean, it’ll prevent the paint from coming into contact with the surface.
A clean and dust-free paint surface will ensure better paint adhesion and effectively bond with your paint.
3. Expired or Low-Quality Paint
Expired Spray paint will lead to dusty paint since its formula has already lost efficiency.
Low-quality paint will cause peeling off issues and provide lower coverage. Also, it doesn’t have decent concealing properties. Plus, they’ve poor-quality pigments, so you’ll need to apply more coats.
4. Improper Application
Though it’s uncommon, your painting techniques can result in dusty paint. For example, motion is a crucial part of spray paint.
A side-to-side motion and releasing the tip at the end of each pass can help you get an even spray paint coat.
5. Low-Quality Masking Tape
To ensure a neat and tidy painting job, I use masking tapes. However, low-quality masking tape may damage or leave residue on the surface. This ultimately leads to dusty paint.
6. Overspray
It’s a general rule of thumb to go for single-stage paint without over-thicking the paint surface.
When you give an inaccurate air pressure or incorrectly use the spray paint, it may lead to overspray paint.
Always start with a light coating. Then, if necessary, you can go for another or several coatings. But maintain an even distribution of layers.
7. Dirty Equipment
I use various equipment such as poster boards, stencils, craft knives, etc. Make sure you’ve already cleaned them before using them in your following painting projects.
Most importantly, if you use a paint sprayer, it’s crucial to clean it every time you use it. Otherwise, the mechanism will be jammed up due to the paint residue.
8. Poor Finishing
Poor finishing won’t provide decent protection from wear, rust, and other external substances.
A surface with a more refined finish works as a protective layer. It should also have an improved appearance.
Dusty Spray Painting’s Outcome During The Painting Process
How you’ll know your painting surface has dusty paint? Here’re the signs you’ll notice.
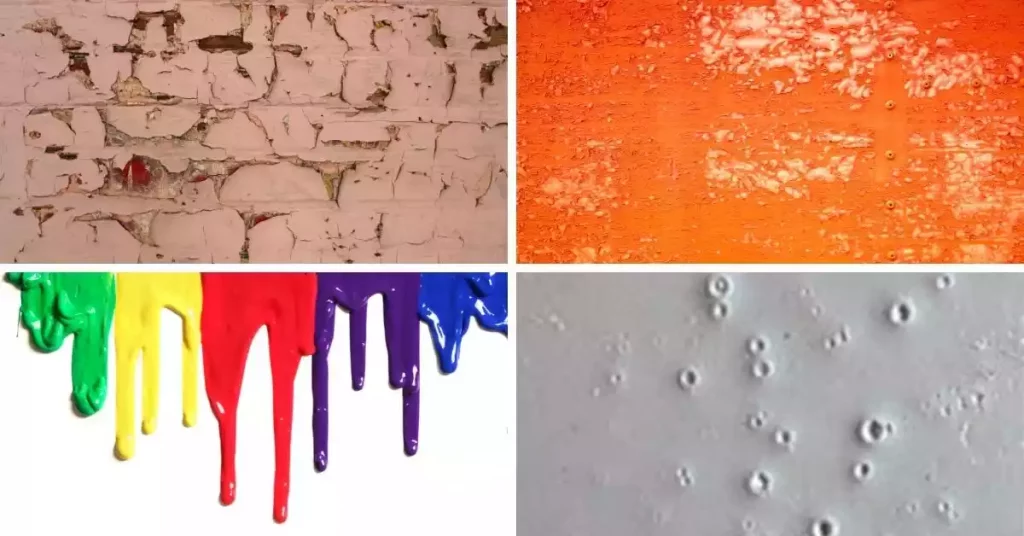
a) Cracking
A cracking paint means the original substances start to peel off automatically over time. It may look like hairline cracks in the paint surface. Generally, spray paint crackle occurs due to the splitting of a dry paint film.
b) Paint Blobs
Paint blobs mean when one or a few drops of paints are accumulated on the paint surface. This might be unnoticed while painting the surface. But it’ll start to peel off since other areas are smooth compared to the paint blobs.
c) Orange Peel
Achieving perfect texture is crucial for even coating. For example, an incorrect paint surface appears like an orange peel.
It can happen for several reasons, such as setting up the spray gun incorrectly, following the wrong angle for spraying, excessive usage of paint, untimely evaporation paint.
d) Flaking and Peeling
If the underlying surface of a painted surface is cracked or flaked off, it’s called paint flaking.
Paint flaking means your paint surface doesn’t have a proper adhesion to prevent the substrates from lifting and peeling away.
e) Runs and Drips
Various factors can cause paint to drip. It may result in using unsuitable paint thinner. The problem can also pop up from using excessive paint thinner.
f) Shrinking
When you use heavy and very wet coats, it’ll cause paint shrinkage. Also, using too much primer too fast and sanding too soon may lead to this problem.
g) Spray Paint Lines
Using the spray paint in the correct pattern is crucial. Otherwise, it’ll cause disturbances and streaks issues, and you’ll struggle to get rid of spray paint lines.
You may see a line on the spray paints for several reasons: damaged nozzle, disruptive material supply, too low-pressure setting, etc.
h) Fish Eyes
Sometimes, you’ll notice some small, round-shaped craters on your paint surfaces, which are called fish eyes. It mainly happens due to substrate contamination.
You’ve to be careful while using the spray tool to ensure no oil or water enters the air stream. Otherwise, you’ll notice fish eyes on the paint surface.
Read More: Best Spray Paints for Guitar
Most Important Tools You Need to Fix Dusty Spray Paint Job
Some crucial equipment is necessary to get the spray-painting job done.
- Intact Spray paint
- Sanding block
- Trisodium phosphate (TSP)
- Wire brush
- Sandpaper
- Alcohol
- Spray Gun (optional)
7 Tips and Tricks to Make Spray Paint Smooth and Shiny
So, you’ve learned what tools you’ll need to fix uneven spray paint. Let’s get in the steps.
1. Prepare The Surface
The first crucial task is preparing the paint surface. I use spray paint on various surfaces.
i) Metal Surface:
Would you like to know how to fix spray paint runs on metal? Pick a fresh cloth to remove dust and other unwanted substances from the metal surface. Next, use a wire brush to clean rust. Finally, utilize grit sandpaper to remove the loose paint from the surface.
ii) Plastic Surface
Many people think about how to fix wrinkled spray paint on plastic. At first, get rid of any dust from the plastic surface. Then, use wet sanding gently to sweep out loose substances. Now, add a few drops of alcohol to the surface to remove oils.
iii) Wood Surface
Planning to fix spray paint mistakes on wood? Removing paint coats from a wood surface requires trisodium phosphate (TSP). Additionally, you’ll have to use rough grit followed by fine-grit sandpaper to ensure a sleek and smooth texture.
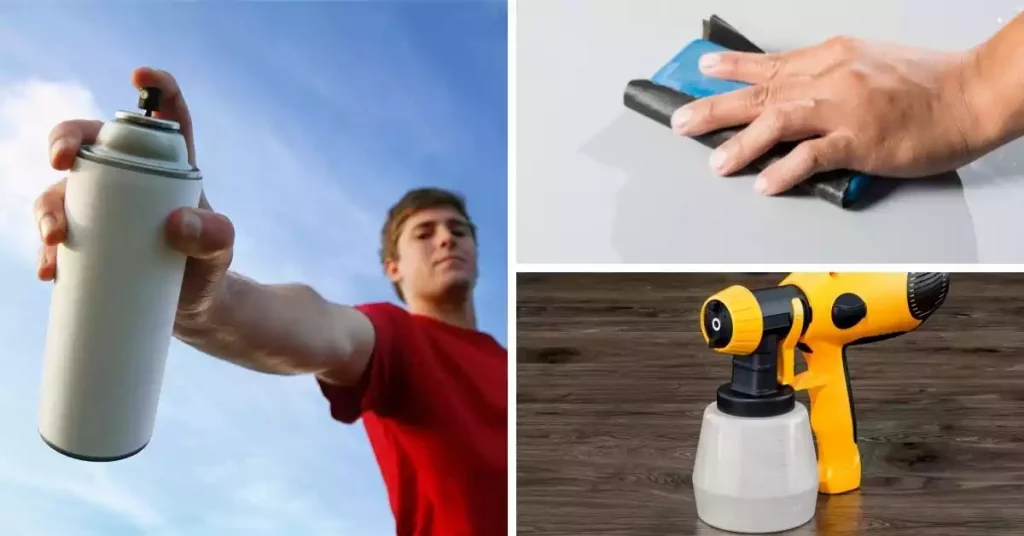
2. Shake Paint Before Use
The next is shaking the new spray paint properly for at least 15 seconds. That’ll help you to achieve a finer dispersion of the liquid.
3. Adjust Spray Gun Pressure
Many people prefer to use a marking wand or a spray can handle instead of using paint from the can. You can adjust the spray pressure with a spray gun or paint marking wand thanks to a control knob that comes with it.
In order to do that, you need to carefully place the can into a spray paint marking wand or trigger. After that, you need to make sure of the following things:
At first, set up the setting to low-pressure to test its efficiency. A decent pressure setting will help you achieve a smooth and complete paint pattern.
There shouldn’t be any gaps where spraying the paint through the tool. If you notice any cracks, increase the setting a little bit. But don’t go too high initially.
4. Maintain A Proper Painting Distance
The liquid pressure of spray paints varies from one to another. So, their painting distance will be different from one other. Generally, you can know about the proper distance from the brand labeling of your spray paint. But in case you didn’t find it, the wise decision would be to have a 10-12 inches distance.
5. Wipe The Nozzle
Take a warm, damp rag to wipe the nozzle. If the nozzle is clogged up, you can use lacquer thinner to unclog it. Then, test it on scrap materials to check its effectiveness.
6. Keep It Thin
Now, start spraying the paint on the surface. Begin painting from the side area. Then move to the target surface.
Never go for a thick coating in the first round. A thin layer will be fine. Make sure to follow a straight line to paint the surface. This’ll ensure a smooth and even coating.
After completing one thin coat, you’ll have to wait for 30-45 minutes to dry up the paint. But the waiting period can be more or less based on your paint type.
Then, you can go for the second coat. Be careful with the second coating to prevent too thick layers. Also, maintain an even coverage for the second coat.
Finally, complete the paint task with a clear coat and a topcoat. You may have to use additional stuff to fix the uneven coating.
7. Clean Your Equipment
After completing all the paint tasks, your last job is cleaning the tools. It’s a solid rule of thumb to the manufacturer’s instruction to clean all the equipment.
Generally, you’ll use a solvent or normal water to clean the supplements. You’ll have to keep spraying for several minutes until thoroughly cleaning all the tools. After that, dry your paint supplies in the air and store them in a cool and dry place.
Read More: Will Spray Paint Kill Grass
Frequently Asked Questions
Why is My Spray Paint Dusty?
Unless you allow enough time for the paint to dry or paint the surface in the wrong way, which leads to proper contact with the paint surface.
How do You Fix Blotchy Spray Paint?
To fix blotchy spray paint, you will first make it dry and sand down the blotchy spot using a fine-grit sanding block. Keep sanding down the area until it looks similar to its nearby area. Now, you can go for the subsequent coating.
How to Fix Dusty Spray Paint Cracks?
1. First, sand down the cracked area
2. Use a paintbrush to remove sanded substances
3. Apply a thin layer of latex primer. Let it dry for 6 hours.
4. Next, paint the first coat of spray paint. Wait for another 4 hours.
5. Then, go for the second coating.
How do You Fix Lumpy Spray Paint?
Use a fine-grit sanding block to smooth and even your spray paint.
How do You Fix Paint Mistakes?
You can use a damp cloth to get rid of the mess if the spray paint doesn’t dry yet. But if it has already dried, using sand will be the perfect option, and then get rid of the dust using a clean brush. Finally, repaint the surface.
Conclusion
Fixing dusty spray paint soonest is essential to ensure a smooth and even coating. I highly recommend you give the above tips a try and then do it again. The more you are late, the harder it’ll be to get rid of the spray paint.
Hopefully, you’ve learned how to fix dusty spray paint correctly.
Happy Painting!

Even though I have 10+ years of experience in the painting business, I am always trying to learn the latest coloring methods. I have been into colors since my teenage days. I spent a lot of time experimenting with new painting methods on multiple surfaces. Now, I want to spread my knowledge through my blogs and articles.