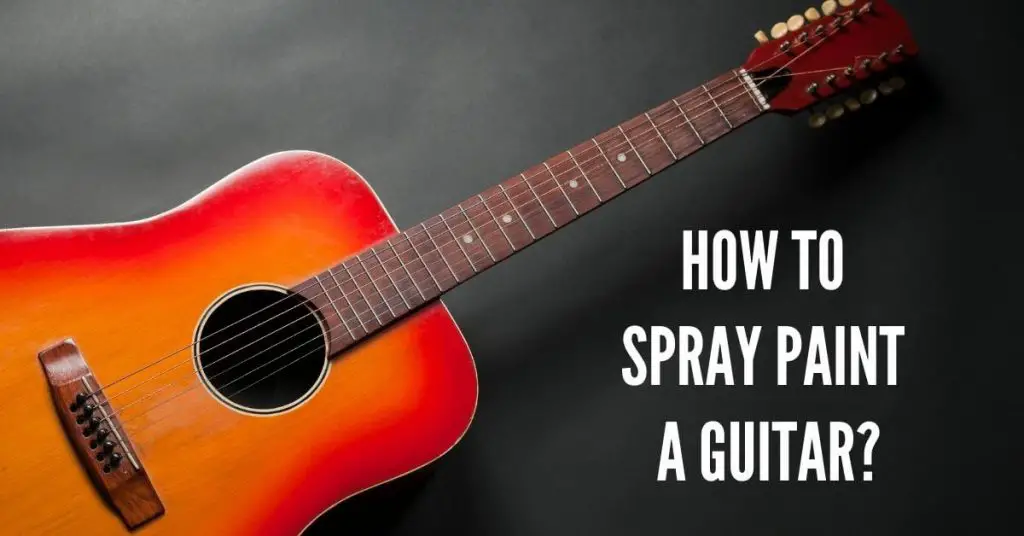
We all want to give our beautiful guitar an alluring look to make it stand out. But when it becomes old, its attractiveness fades over time. Adding an eye-catchy spray paint can make its appearance more than a new guitar.
However, it is not as simple as spraying painting on typical surfaces to paint a guitar. Following wrong approaches and using cheap spray paints may end up damaging the musical instrument. So, cautiousness is crucial.
This post will walk you through how to spray paint a guitar step-by-step, along with some other valuable information. Let’s dive in!
Table of Contents
What Kind of Guitars Can Be Spray Painted?
Mainly, three types of guitars are available in the market: bass, acoustic, and electric. But you can’t use spray paints for all types of guitars.
Generally, electric guitars are suitable for spray painting since the paint won’t affect the sound of the musical instrument.
After all, amplifiers and pickups are the two crucial parts of an electric guitar that play a key role in creating the vast majority of its sound.
In contrast, it is better not to use spray paints on acoustic guitars. The reason is that a considerable amount of sound is generated from the guitar body.
It may miss out on its originality. Just because you want to enhance its appearance doesn’t mean you will compromise its sound quality.
How Does Spray Painting Work on Guitar?
When we spray paint a guitar, we generally mean electric guitars that are made of alder, basswood, or mahogany woods. The way the guitar surface will react after applying the paint is a salient thing to consider.
In order to get better results and finish, you want to maintain consistency. Whether you are using polyurethane, lacquer, or enamel-based paint, make sure to apply the same formula for sealer, primer, color coat, and clear coat.
But knowing the right way of spray painting is important aside from matching everything up formula-wise. Also, you need to have a decent idea of the process of sanding and polishing a guitar.
How Hard Is It To Paint A Guitar Body?
Painting a guitar with spray paint is a precarious task but not out of the question. You have to sand the guitar surface precisely before painting.
Since the guitar already has paint and a seal, getting rid of the existing coat of paint is necessary. Only then can you add new paint.
At first, you want to utilize a paint scraper and use heat to remove the old paint. Then light sanding is necessary to make the surface smooth. Finally, you can paint the surface.
Though the entire procedure will take a considerable amount of time and effort, it is worth everything if you want to customize your guitar look.
What Materials Do You Need To Start Spray Painting Without The Mess?
Before learning how to paint a guitar with spray paint, you must know the materials to start spray painting.
The followings are some usual things you will require for guitar spray paint.
| NO. | Items Name |
| 1 | Spray paint |
| 2 | Putty knife |
| 3 | Rag |
| 4 | Protective equipment |
| 5 | Primer |
| 6 | Well-ventilated area |
| 7 | Sanding paper |
| 8 | Hairdryer or heat gun |
| 9 | Liquid polishing compounds |
How to Transform Your Guitar with A Simple Spray Paint Job?
First, you must prepare the musical instrument properly to achieve the best guitar finishes.
Make sure to remove the old paint properly to guarantee nothing sticks on the surface. Also, sand the guitar surface appropriately to make it as smooth as possible.
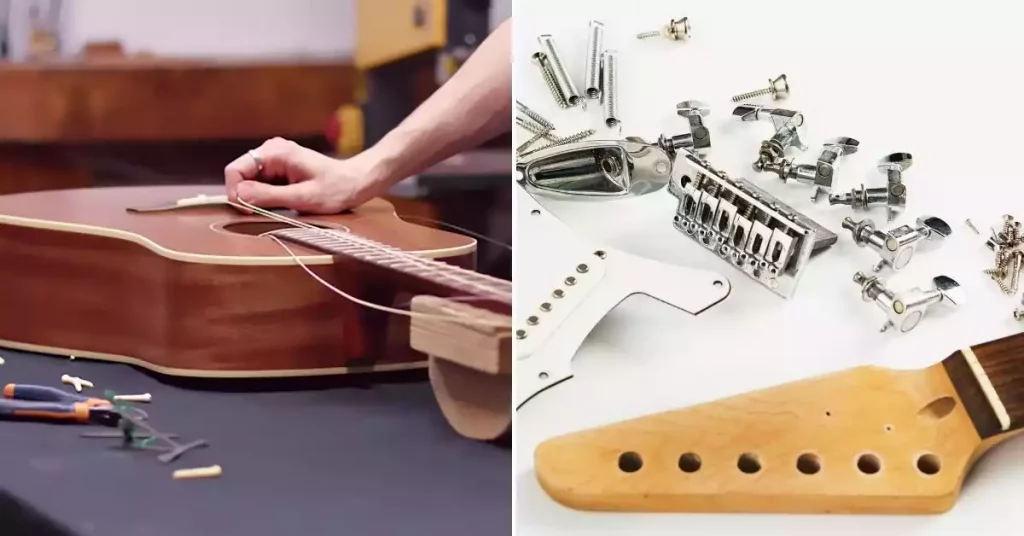
The finer the guitar surface is, the better will be the result. Don’t forget to disassemble all the possible parts of the guitar.
Apart from protecting the internal components from painting, your painting job will be easier. Please keep all the necessary items close to you to avoid wasting time searching them unnecessarily.
How to Paint A Guitar Body Professionally: The Quickest, Easiest Way to Cover Up A Scrap
Here comes the long-awaited part. Using spray paint for guitar body requires you to follow some crucial steps. Here are they:
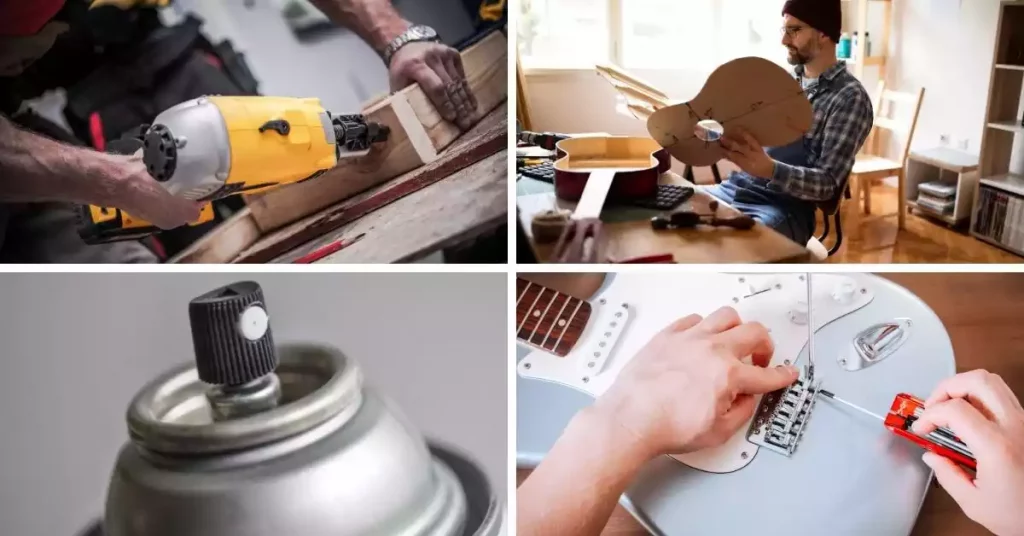
Step: 1 —Taking Apart the Possible Guitar Parts
The first task is disassembling all the possible components of the guitar. Make sure to keep them in a safe place, including the tiny parts.
Step: 2 —Removing Old Paint
Grab your heat gun and blow hot air close to the old painted surface. Make the finish heated. This will soften the finish. You can also use a hairdryer for spray painting.
Now, use a sharp putty knife and remove the coating slowly. Keep the heat setting low initially. Then, increase it gradually if necessary.
Make sure to move the heating machine continuously to avoid burning any particular surface. Removing the upper coat will make the remaining task easier.
Take out as much paint finish as possible. Be caution. Don’t overpressure while using the sharp putting. You may damage the guitar surface.
Step: 3 —Preparing the Body
After removing the dull paint from the guitar body, you can focus on guitar body painting. But, first, check out different sides of the guitar.
Look for any chips, dings, or other flaws that need extra care while painting. If there is any dust, use a fresh fabric to get rid of them.
Step: 4 —Sanding the Guitar Surface
Now, it’s time to sand the guitar surface to make it as smooth as possible. Initially, work with 120-grit sandpaper.
Make sure to sand the while surface in only grain direction. Look closely and remove any sealer or finish substances from the surface.
After a complete sanding session, grab a damp rag and use it to clean the entire guitar body. Let it dry properly.
Follow the same process for sanding the surface until it becomes smooth. You can use 220-grit sandpaper for the second sanding and 320-grit sandpaper.
Generally, 3 or 4 times sanding appears enough. Don’t rush. Take time for each sanding session. Clean the surface appropriately after every sanding session.

Step: 5 —Final Preparation for Spray Painting
Now, you can spray paint on the guitar surface. Hang the guitar on the wall in a safe place to spray paint your guitar.
A wood handle will make the painting task easier by allowing you to spray paint in different directions and let the paint cure properly.
Make sure to warm up the guitar spray paint cans by sinking the container inside a mild water bowl. This will aid you in getting the best result and perfect finish.
Step: 6 —Spray Painting for Day One
At first, you want to give a light misting or tack coat. Then add the next heavy, wet coat. This will help you achieve a generous adhesion between both coats and get a perfect finish.
You may have to apply 2-3 coats based on the type of spray paint you use. Check here to find the best spray paint for guitar. Keep a 90-minute break between each coat. Let it dry overnight. This will ensure better curing.
Step: 7 —Spray Painting for Day Two
Now, put a backing pad on a level surface and keep the guitar. Use 320-grit sandpaper for sanding the entire body of the guitar gently.
Generally, you will focus on removing high spots. Wipe the body to remove all sanding residues.
Add 2-3 layers of spray coatings. Make sure to keep 90 minutes break. Each layer should be unique. Let it dry overnight.
Step: 8 —Spray Painting for Day Three
Again, you need to sand the guitar body using 320-grit sandpaper to smooth the surface. Get rid of sanding substances after properly sanding the surface.
Instead of 90 minutes, you can now take 60 minutes to break after applying each coating. But apply 3-4 coats this time. Let it dry overnight.
Step: 9 —Spray Painting for Day Four
On the fourth day, you want to sand the guitar surface again using the same grip sandpaper and following the same procedure for cleaning it. Take the edges too.
Again, apply 3-4 coats. Maintain 90 minutes gap. Avoid painting on unnecessary areas. Your guitar now has 7-9 topcoats. Let it dry overnight adequately.
Step: 10 —Spray Painting for Day Five
Now, again use 320-grit sandpaper for sanding the flat surface. Aim at removing the shiniest spot by this time. Again, achieving a consistently flat surface.
Then, add 3-4 coats again. Keep 90 minutes break. Let the paint dry overnight.
Step: 11 —Spray Painting for Day Six
On the sixth day, the guitar surface will need lighter sanding. So, use 600-grit sandpaper for sanding.
After proper sanding, keep the guitar body in a dry and warm location for at least 12-14 days. Let it cure properly. You will achieve a finer finish.
Step: 12 —Dry Sanding
Grab 800-grit sandpaper and gently sand the guitar surface again. Remove sanding residue after completing the task.
Some orange-peel texture may appear while the guitar surface is in the cure period. Don’t forget to wipe them off too.
Step: 13 —Wet Sanding
Now, you want to give the last finish to the guitar surface. Use 1200-grit micro-finishing paper for sanding along with water.
Remove any extra water and hard specks that disrupt the sanding session. You can use a soft rag. This won’t cause any scratch.
Finally, use another soft and fresh fabric to wipe the entire guitar surface. Nothing should be left on the guitar body.
Check how glossy shine you have achieved. Now, you can assemble all the guitar parts together. That’s it!
What are The Different Techniques for Spraying Guitars?
Learning several techniques will make the guitar clear coat more smooth and sophisticated. Here are the top techniques:
Spray from An Ideal Distance
Some people spray paints from too far, and some do it too close. Maintaining a proper distance is crucial to getting the best result.
Find the sweet spot first. Then maintain consistency while applying the paint. Finally, move to the next spot slowly after finishing up the current spot.
Maintain Steady Even Motion
Don’t forget to always stick to a steady, even back and forth motion. Slightly overlap the previous pass.
Spraying the paint in a consistent motion will prevent the buildup of paint in one spot and ruin the entire appearance of the guitar painting.

Start and End Beyond Edge
New beginners often mistake leaving a mark on the painting surface. They generally start from the middle or upper part. Avoid making this approach.
Initially, the paint may come out too thick or too thin. It is a solid rule of thumb to start and end the paint beyond the edge. This will help you hide flaws and marks.
Add Several Light Coatings Instead of A Heavy Coat
Instead of adding a heavy coat initially, add several light coats and check the surface thickness. Then, if needed, you can add a further light coating.
Though it will take more time, it is worth the effort. Prevention of over-spraying will incur. More importantly, it ensures no or minimal flaws.
8 Important Things to Remember for a Flawless Spray Paint Job on Your Guitar
I have already outlined what needs to successfully complete your entire spraying paint on guitar. Check out these crucial factors for extra cautions.
1. Disassembling The Guitar
Some guitarists may want to spray paint without disassembling its parts. Though it is somehow possible, you will face extra hassle for it.
For instance, you may fail to reach a particular area to paint or end up spraying on an unwanted area. This may affect the sound quality at the end.
2. Properly Cleaning The Surface
Before spraying the paint, you need to clean the guitar surface properly. Make sure you remove the sanding residues after each sanding session.
3. Tiny Touchups
There might be some spots that require tiny touchups where the spray paint won’t give precise results. Add spray paints to a jar. Use an airbrush to paint the spots.
4. Use A Handle for Assistance
It is a good rule of thumb to use a handle to hold the guitar while spraying. And, make sure to keep the guitar on a safe, flat surface while sanding it.
5. Heating up The Spray Can
It is always best to heat the spray can by placing it in a mild water container. This will flow out in a better way, and the viscosity will alter.
6. Take Enough Time For Sanding
Finishing a guitar with spray paint requires sanding the guitar surface multiple times. You must sand the guitar body before spray painting several coats.
7. Clean The Nozzle
To avoid a clogging tip, use wet paper to clean the nozzle while painting the guitar. It would help if you cleaned the nozzle whenever you see spattering issues.
8. No Need to Use Any Primer
Paint for guitar finishing doesn’t require any primer since you will sand the guitar surface several times. This will make the surface smooth and have better adhesion.
Don’t Make These Painting Mistakes When You’re Working on Your Guitar
Even after several painting times, many people still make some mistakes while spray painting a guitar. Here are some common of them:
- Aim at reading all the instructions from the spray container to avoid missing out on any paramount details.
- Please avoid using any expired spray paint since it may prevent you get a perfect result or damage the guitar surface through contamination.
- Don’t forget to track down the recoating time because applying the next too early may lead to wrinkle, shrivel, or smudge issues.
- It is a good rule to avoid finishing wet paint as you may invite problems. Please wait until it becomes completely dry.
- Using various spray paints will prevent you from getting consistent and even results. Use only the same paint for a particular surface.
- Be sure not to overspray. Just enough paint to cover the area you’re working on, but not too much that you start spraying paint on the fretboard.
- It is crucial to wear protective equipment such as gloves, eyewear, mask, etc., to safeguard yourself because the paint may get into your body through your nose, mouth, or eyes.
- Be extra careful while using any hazardous and flammable for spray paint. It is a good rule of thumb to use a respirator while sanding.
Learn How Spray Paint Can Benefit Your Guitar Playing
Have you ever thought of using normal painting instead of spray paint for your guitar? Check these top-leading causes why you should spray paint your guitar.
Safe and Clean Product
Compared to brush painting, spray painting is safer for guitars since the guitar is a hard surface like walls that need regular painting.
Easy To Clean
You need to face less hassle of cleaning with spray paint than regular painting. Just keep a new fabric, and wipe out the paints where it appears unnecessary.
Versatile
You can apply spray paint to various electrical guitars that are made of different materials. Make sure the spray paint you use doesn’t cause any chemical reaction.
Easy To Use
Spray painting doesn’t require you to face a lot of hurdles. You have no reason to put the brush in and out to paint continuously. Just press the nozzle and maintain the direction.
No Extra Equipment
It requires so many things when using traditional painting. But spray painting is hassle-free for guitars since you need only some handy items to get your job done.
FAQ’s
Can I Spray Paint My Own Guitar?
Yes, you can spray paint your guitar! It is not as difficult as it seems, and you can get the hang of it with a little bit of practice.
Can You Spray Paint A Guitar Without Taking It Apart?
It’s okay to spray paint your guitar without taking it apart. However, it is not recommended because the paint can chip and flake off over time.
How Many Spray Cans to Paint A Guitar?
This can be a difficult question to answer, as the number of cans depends on the size of the cans, the guitar, and the type of paint you are using. However, a general rule of thumb is a small guitar might take one or two cans, while a larger guitar could take two to four.
Can You Spray Paint A Wooden Guitar?
Yes, you can spray paint a wooden guitar. However, you need to make sure that the paint is compatible with wood also it doesn’t damage the guitar.
Can You Paint A Guitar Without Sanding?
You can definitely paint a guitar without sanding it, but the finish may not be as smooth.
Can You Repaint A Guitar Body?
It is possible to repaint a guitar body. But this may not be the best idea since it is hard to do the paint job perfectly. However, it’s important to make sure that the paint is compatible with the type of finish that is already on the guitar. Also, take care when painting so that you don’t damage the guitar. Finally, use high-quality paint that is designed for use on guitars. If you’re not sure, it’s best to consult with a professional. You’ll also need to re-string the guitar and tune it after painting.
Can I Just Paint Over My Guitar?
Sure, just paint over the guitar. But it is not advised, as it will likely not look perfect, and the paint may not last long.
Conclusion
When painting guitars with spray paints, you want to apply the best approach to get a professional result. I have already mentioned how to spray paint a guitar step-by-step. Make sure to follow them properly.
Since spray painting on guitars takes extra cautions and additional time, you must prepare yourself mentally and have patience until the job is done. With this article, you’ve got a detailed explanation of how to paint a guitar body with spray paint.

Even though I have 10+ years of experience in the painting business, I am always trying to learn the latest coloring methods. I have been into colors since my teenage days. I spent a lot of time experimenting with new painting methods on multiple surfaces. Now, I want to spread my knowledge through my blogs and articles.